Today I want to show you, how you can export the elevation request data from Intune Enterprise Privilege Management into our Power Bi Reports. With this data, we can for example build reports to see, which EPM Rules are still in use, or which files are requested via support approved, to maybe build a managed rule for these as well.
Azure Cosmos DB
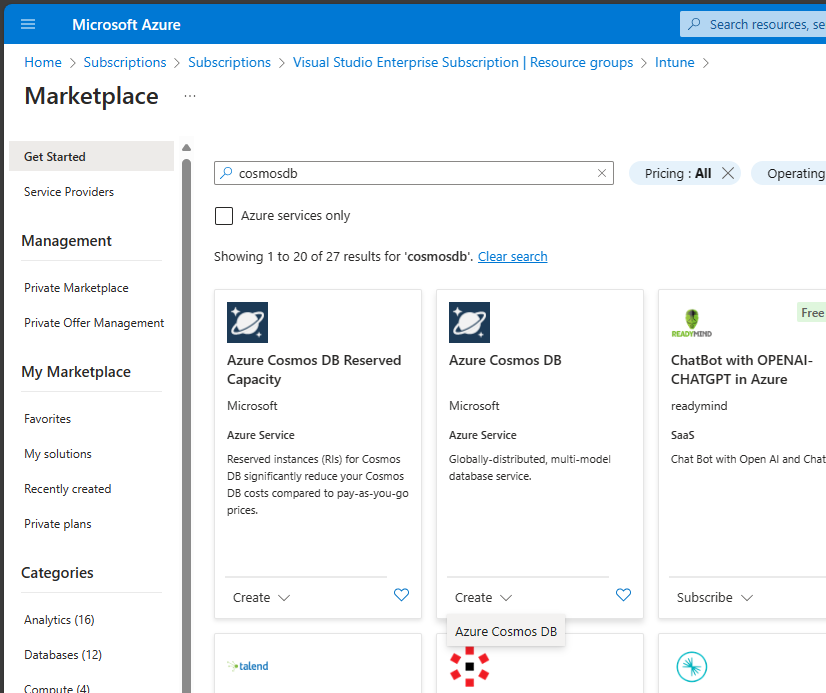
First thing I would create, is an Azure Cosmos DB, which will store the exported elevation information, to be used in Power Bi. If you already have a working Cosmos DB from one of our previous parts, you can skip to the creation of the new container here: Intune EPM Container
New Cosmos DB
To create a new Cosmos DB in an Azure Subscription of our choice, is to search for “cosmosdb” in the Azure Marketplace:
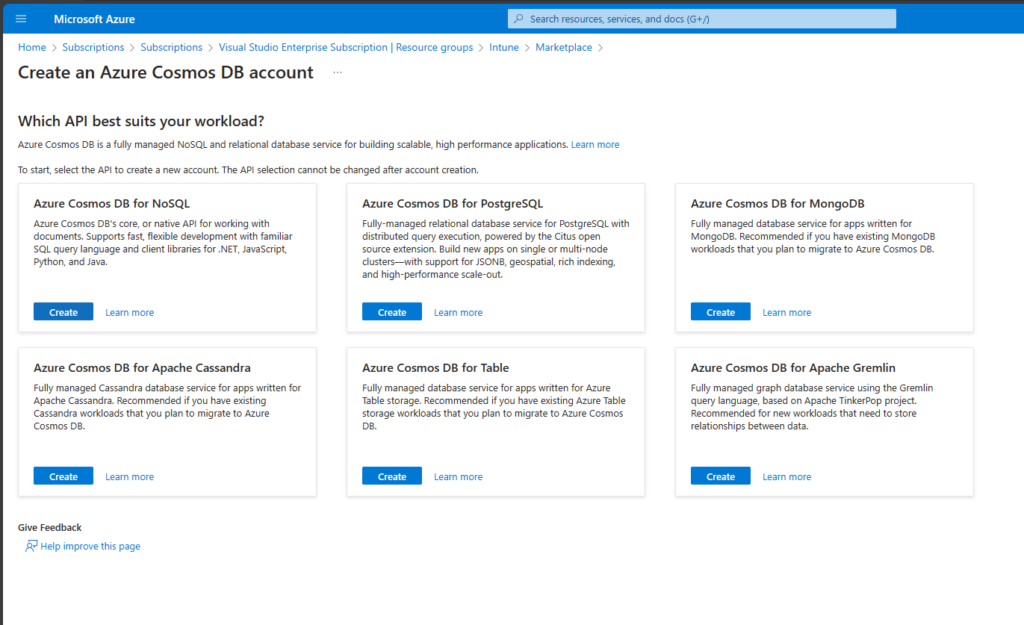
On the next page, we will select “Azure Cosmos DB for NoSQL”:
In the creation wizard, we will select the region in which it should be deployed and give it a name:
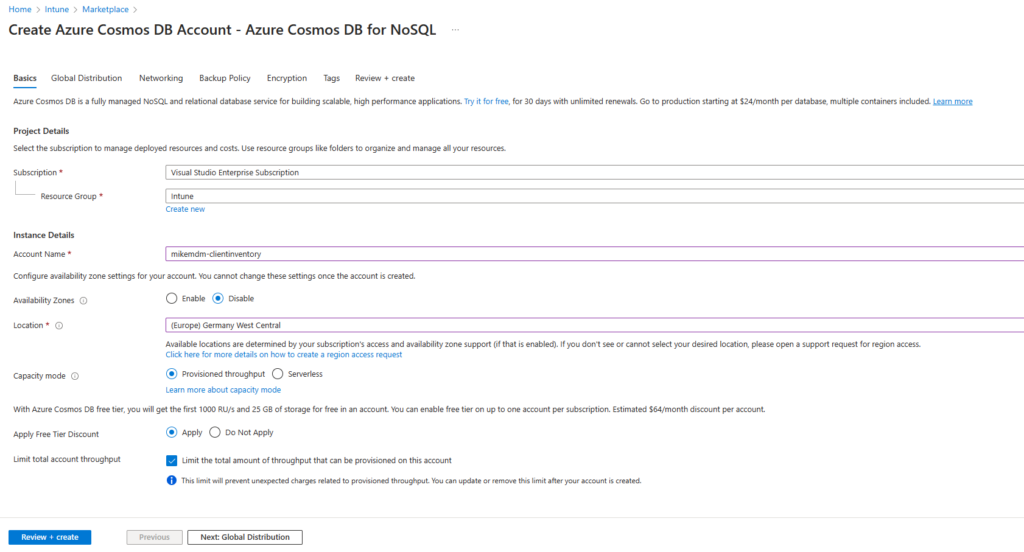
In the other pages of the wizard, you can verify some settings, for this demo, I went with the default values and created the DB:
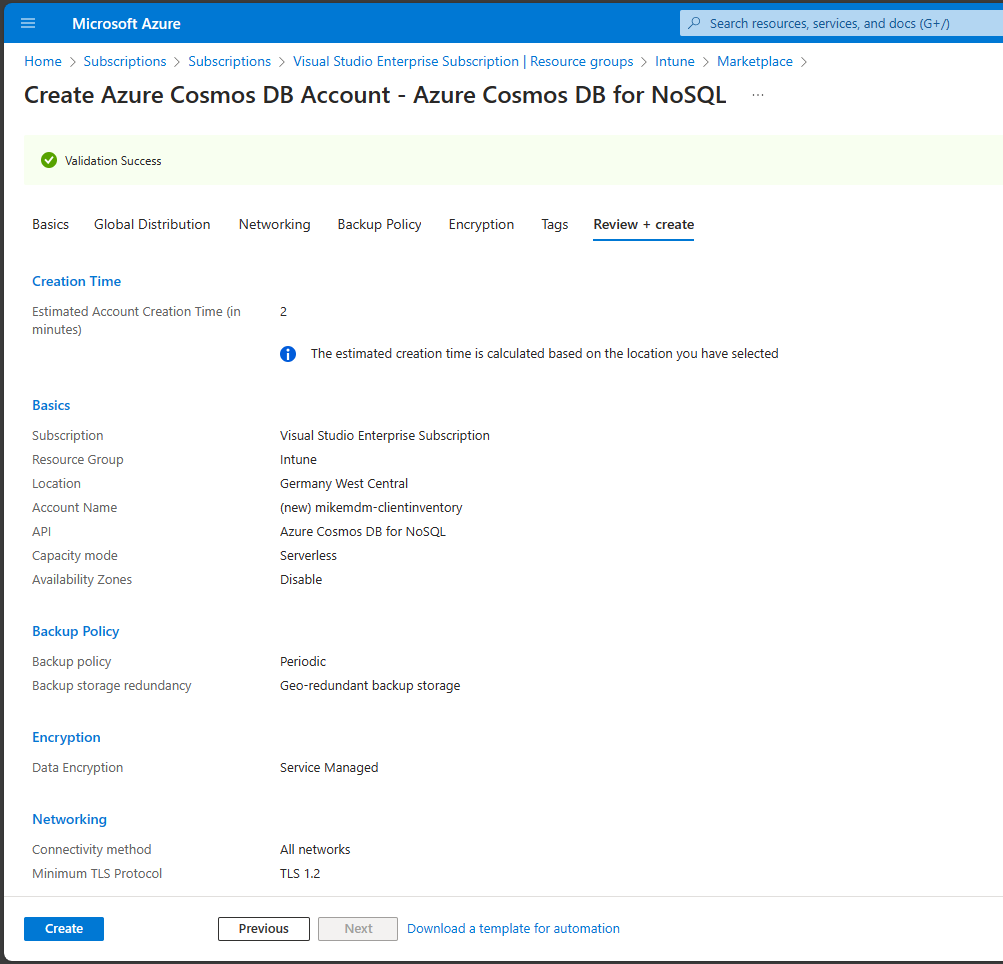
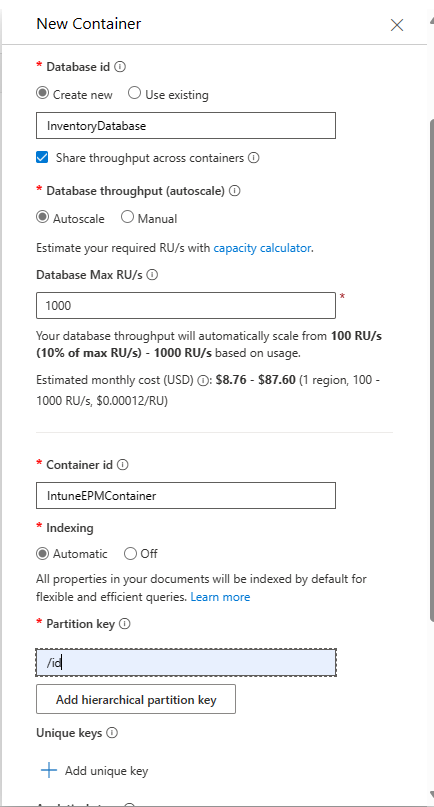
Once, the deployment is done, you can create the first Database “InventoryDatabase” and the needed Container “IntuneEPMContainer”
Intune EPM Container
If you are using the existing Database from the earlier parts of our reporting series, we just have to create the additional Container in the existing DB:

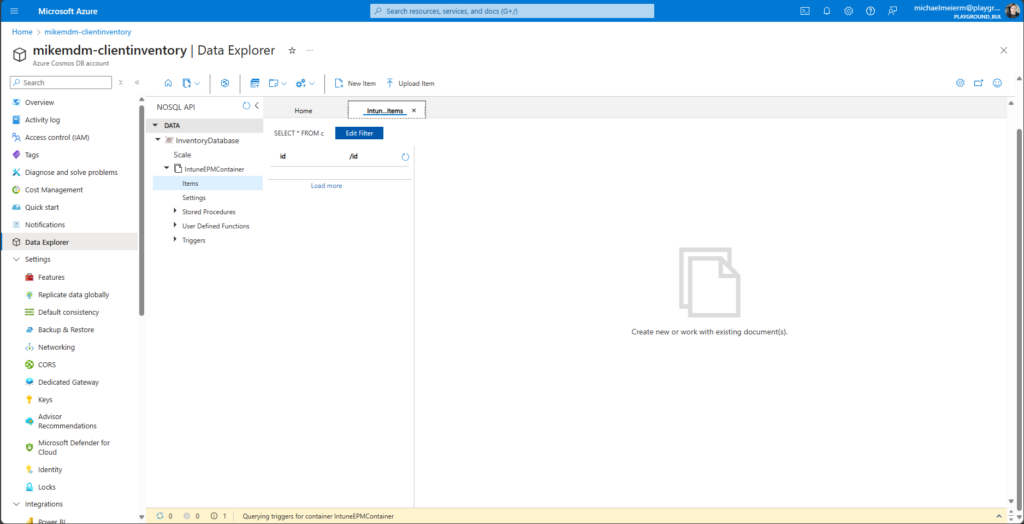
Once created, it should look something like this:
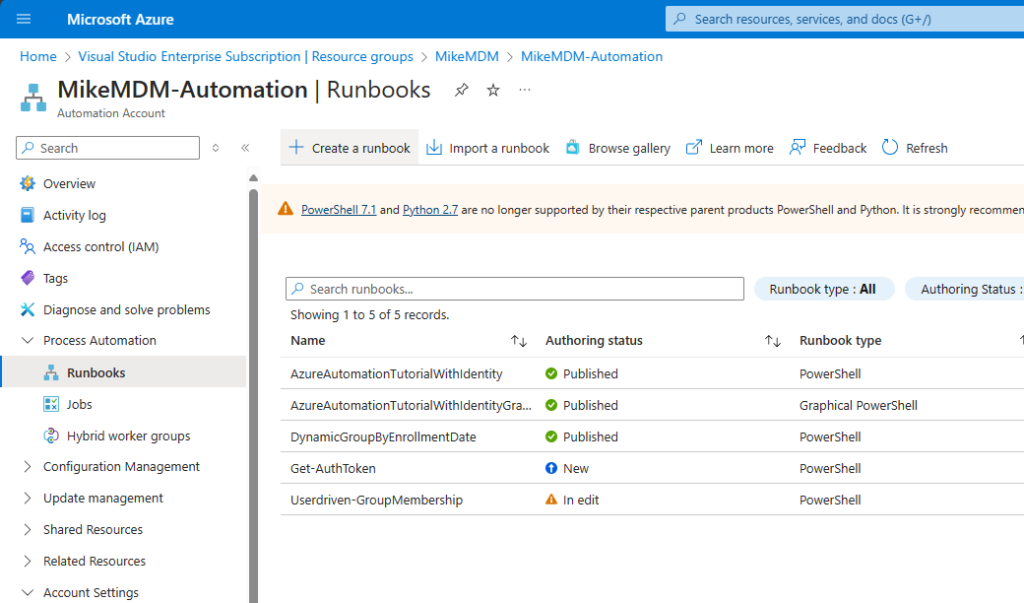
Azure Automation
Next thing, that we need is an Azure Automation Account to export the data from Intune into our Cosmos DB. Again, if you already have a working Azure Automation Account from earlier, you can skip ahead to the creation of the Runbook here: Runbook
Azure Automation Account
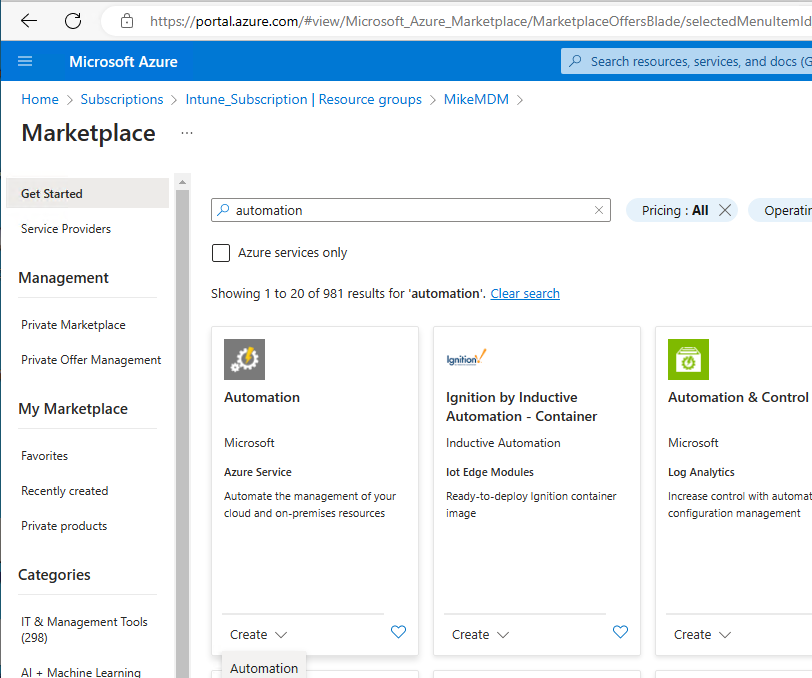
To create the needed Azure Automation Account, we again need to go to the Azure Marketplace and search for the “Automation”
Give it a name and select the region:
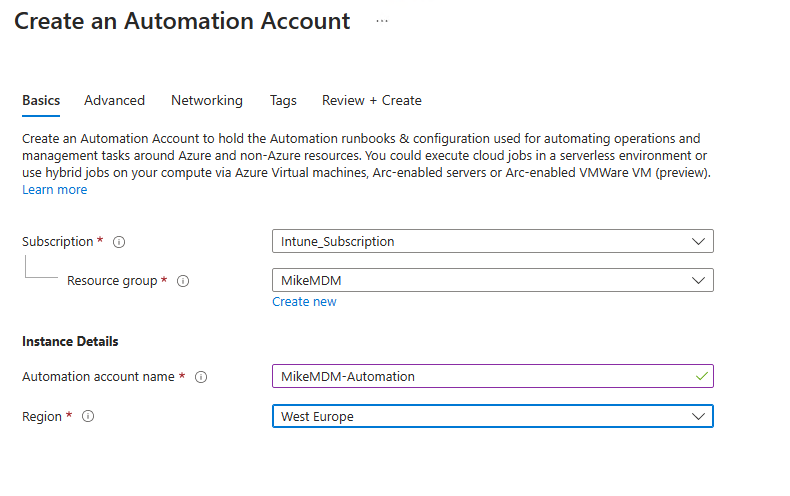
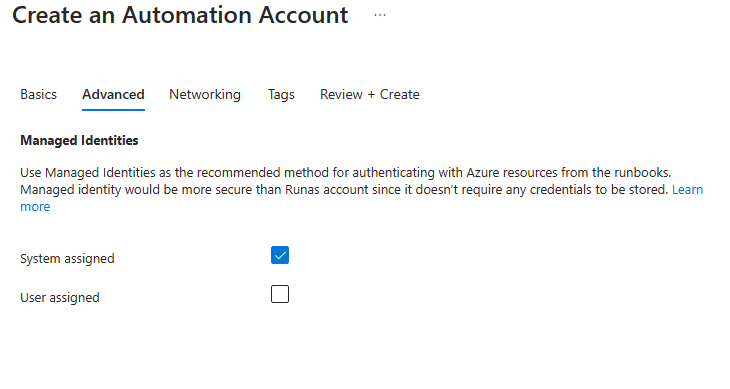
And make sure to enable the system managed identity:
Azure Automation Runbook
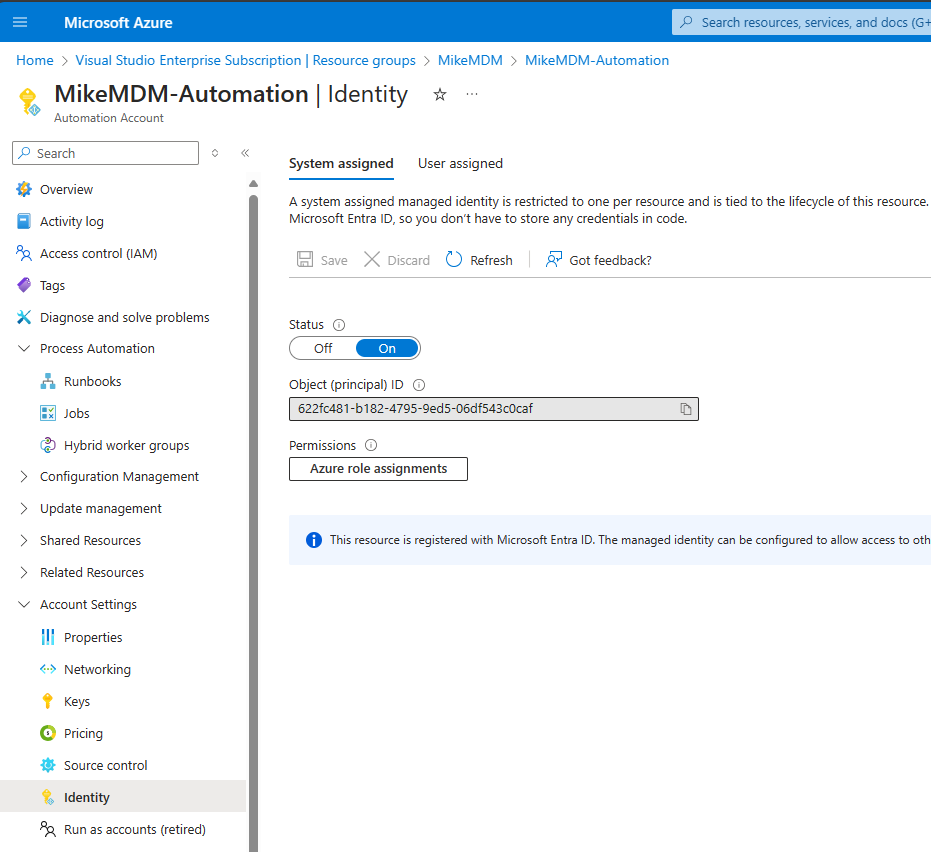
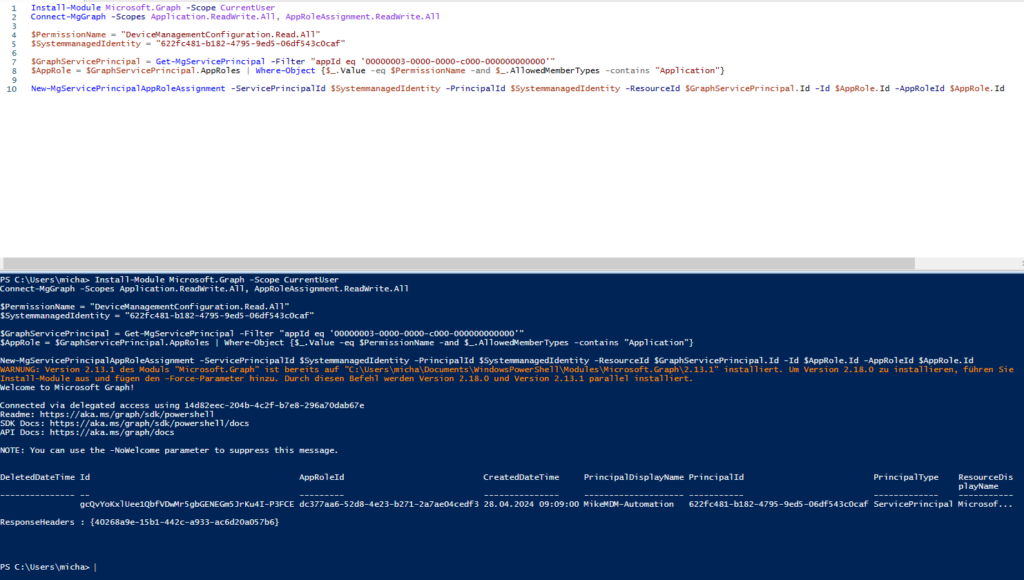
Once the Automation Account is created, we can assign the needed Permissions to the System Managed Identity. Just replace the ID from the Identity Tab of the Automation Account in the Script.
You can find the needed Script to assign the Permissions here: https://github.com/mmeierm/Scripts/blob/main/Inventory/Add-Permission-EPM.ps1
The Script will add the following read permissions:
- DeviceManagementConfiguration.Read.Alll
- DeviceManagementManagedDevices.Read.All
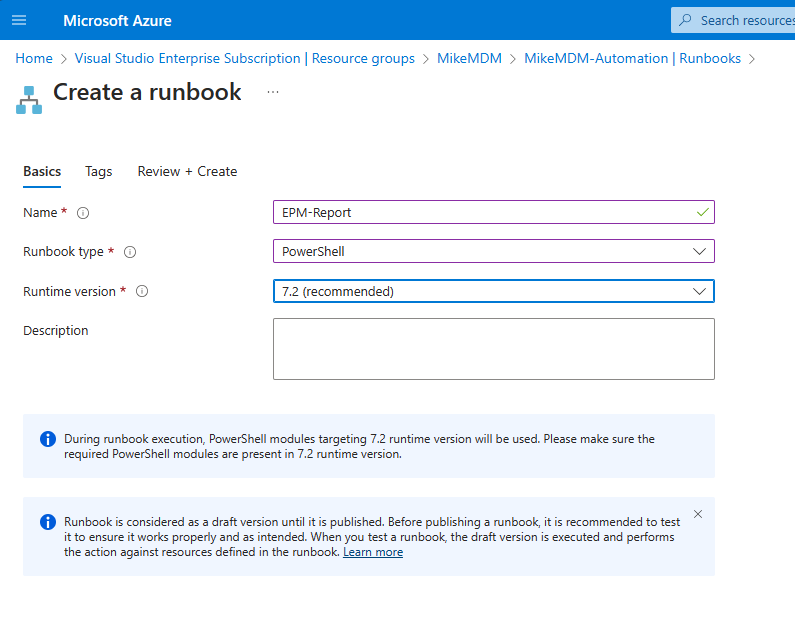
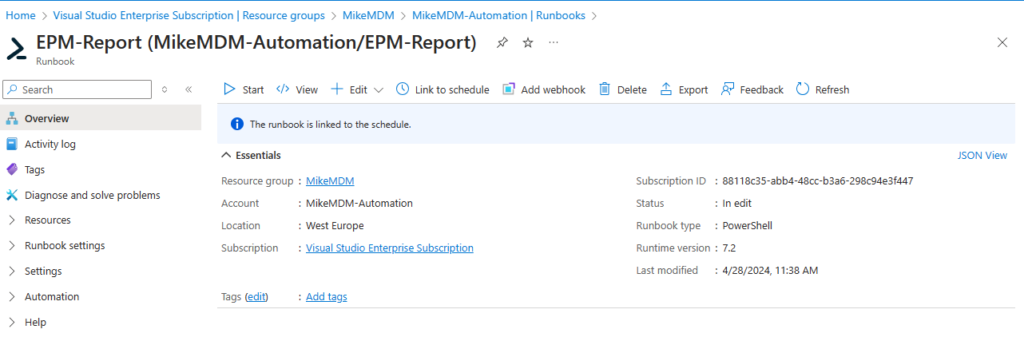
Now that we have all prerequisites, we can create the actual Runbook in our Automation Account:
Give it a name and select PowerShell as Runbook type:
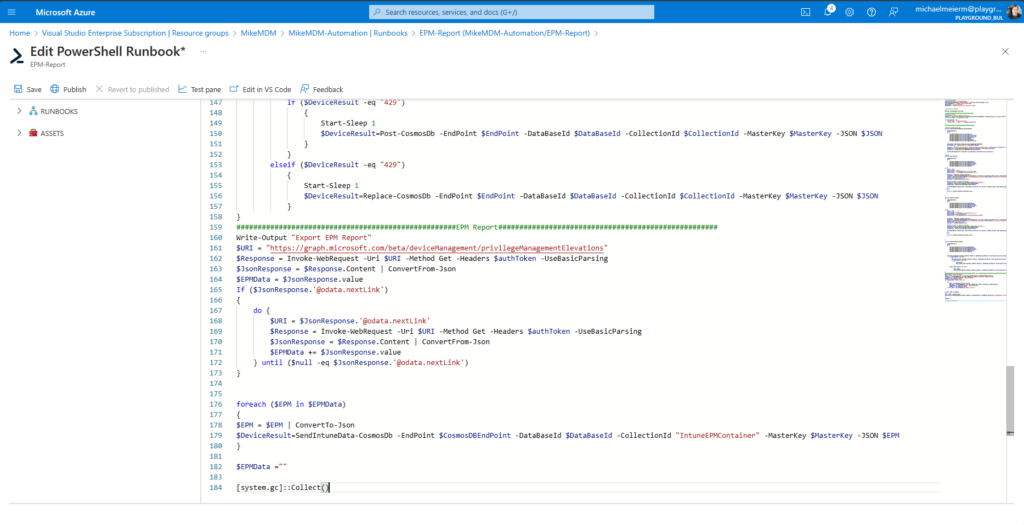
In the actual Runbook, copy the code from: https://github.com/mmeierm/Scripts/blob/main/Inventory/EPM-Report-Runbook.ps1
And modify the parameters to match your Cosmos DB:
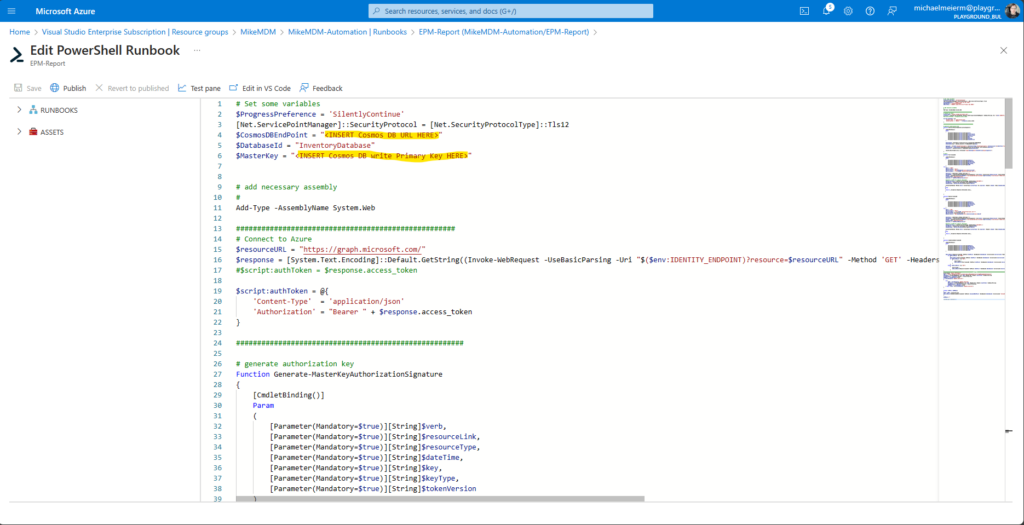
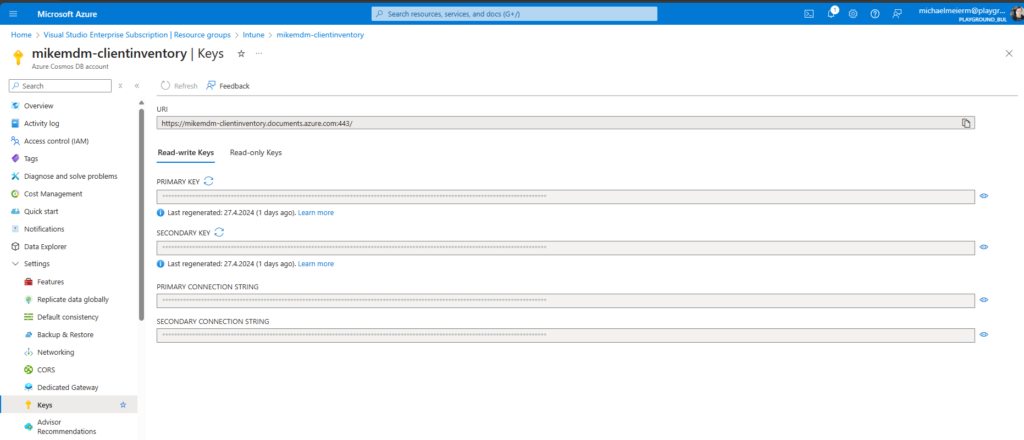
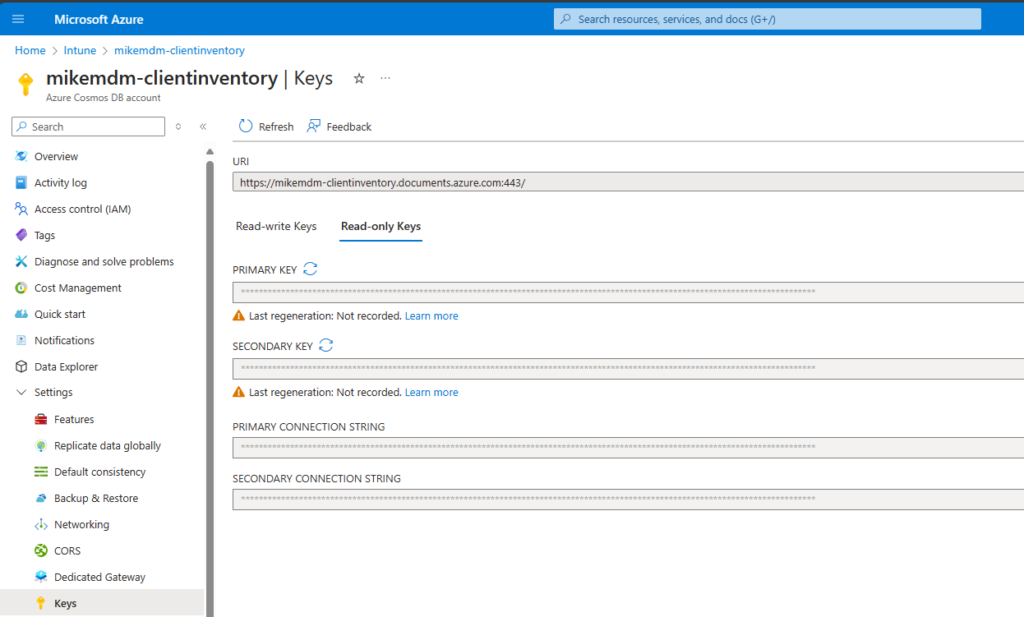
You get these info’s from the Keys page of the Cosmos DB:
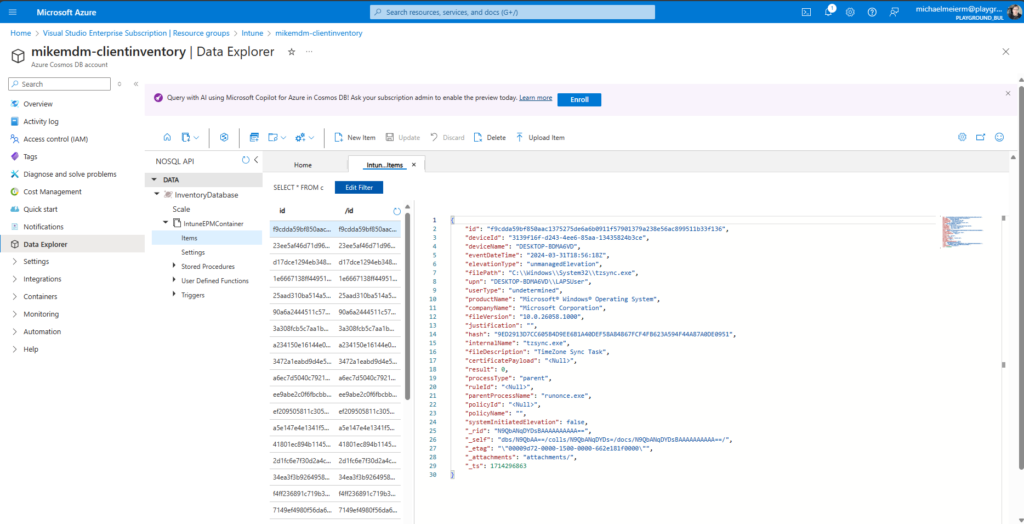
Once Published, you can run it for the first time, and you should see entries for each elevation in your Cosmos DB:
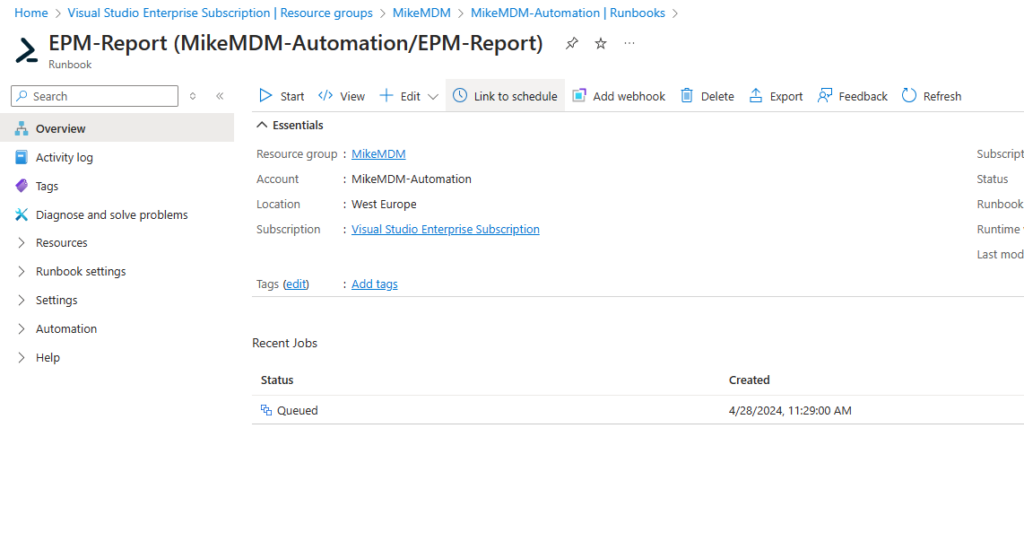
If everything worked as expected, you can link the Runbook to a schedule, to automatically export the data.

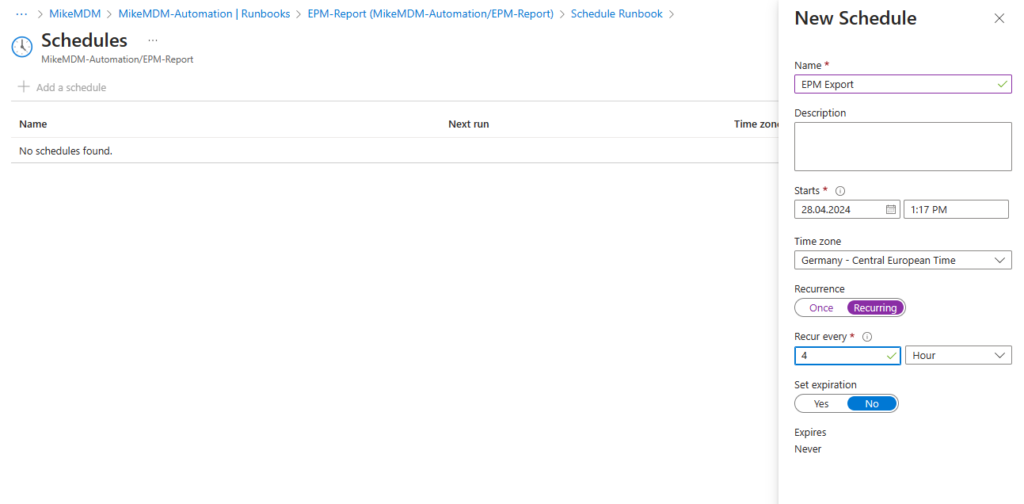
Configure the new schedule to run recurring with an interval of your needs.
Power Bi
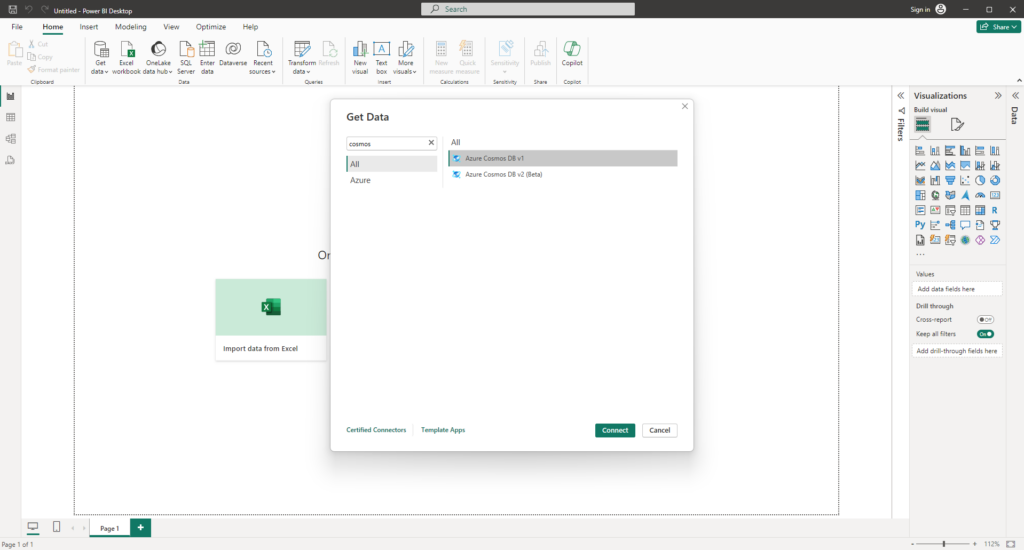
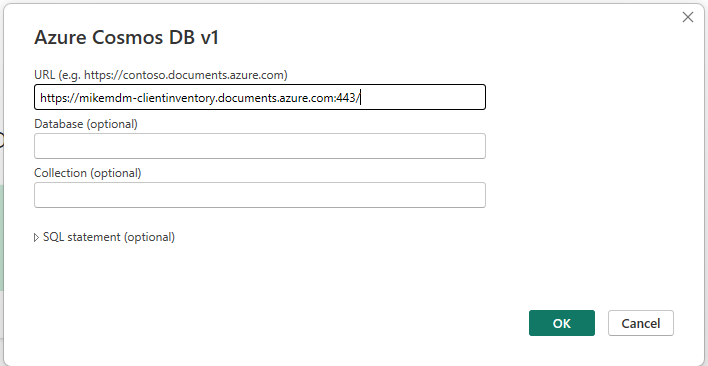
Last but not least, we can now finally create our reports in Power Bi. Let’s start with a new Report and select as data source “Azure Cosmos DB v1”:
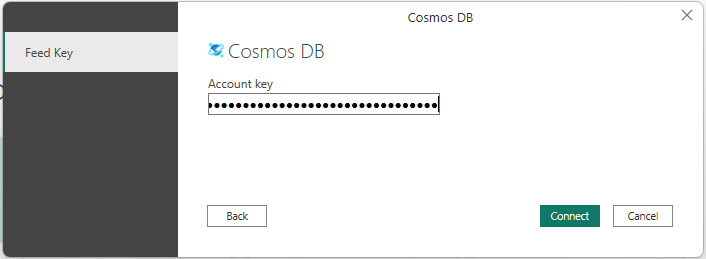
You will find the needed connection information again in the Keys section of the Cosmos DB. Here we can use a Read-only Key, since we won’t change data from PowerBI.
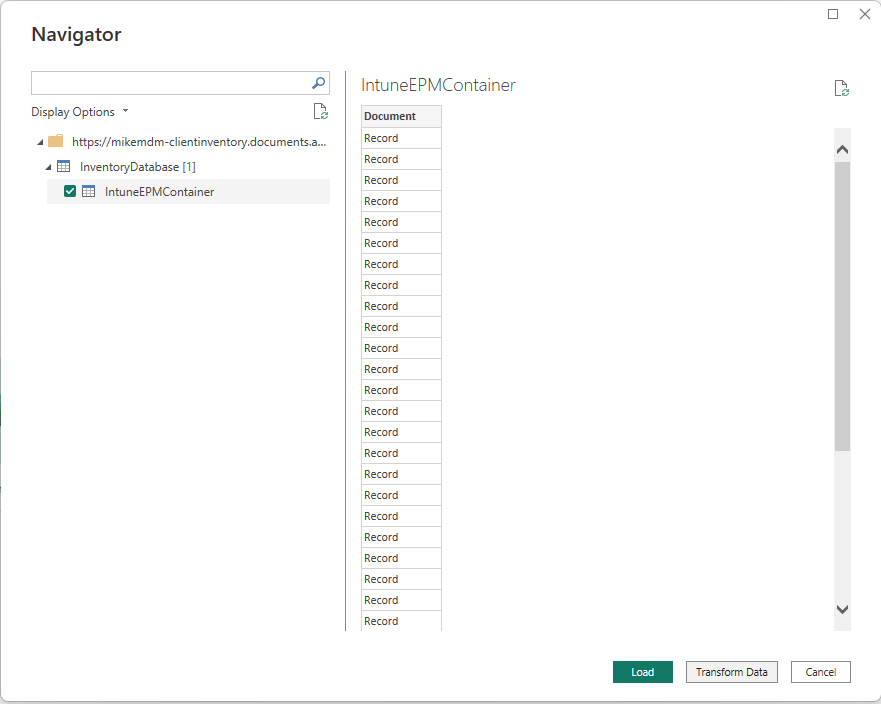
Once we are connected, we can select the needed Table in Power Bi and select Transform Data, to read in all reported data:
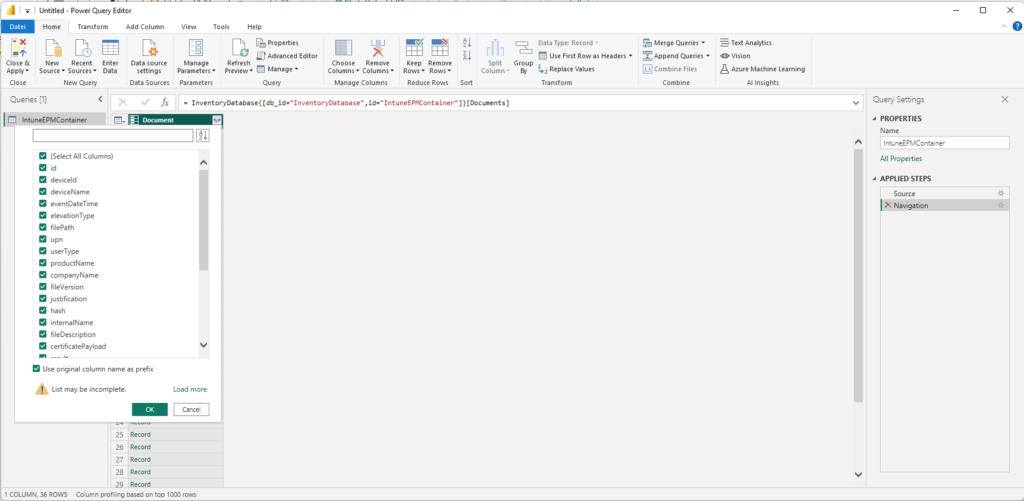
In the Power Query Editor, we can expand the Table to reveal all data:
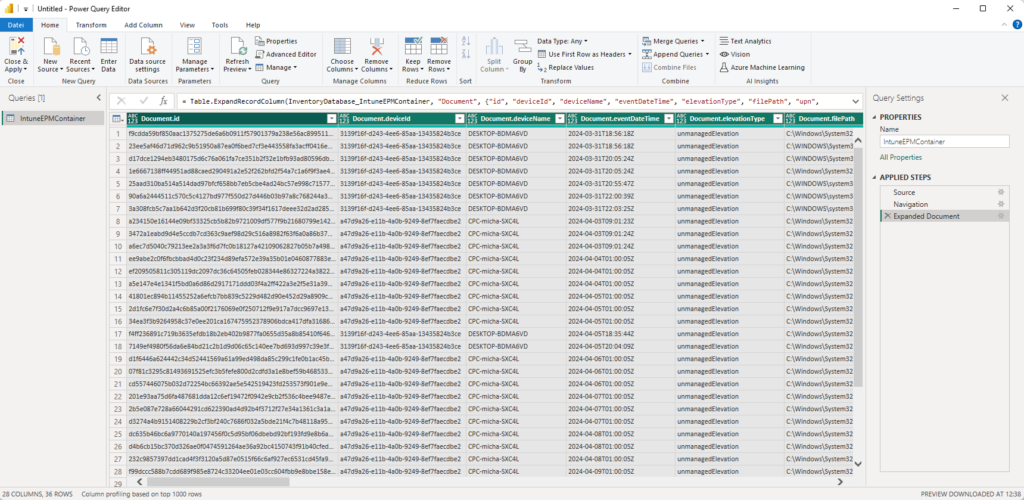
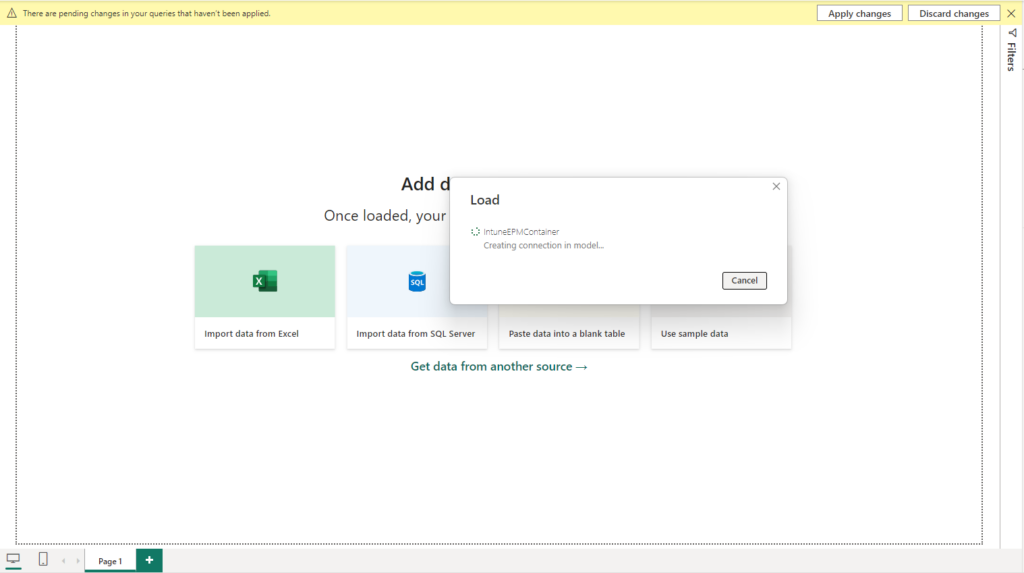
Once everything is there, we can close and apply the Power Query Editor, to load the data in our report.
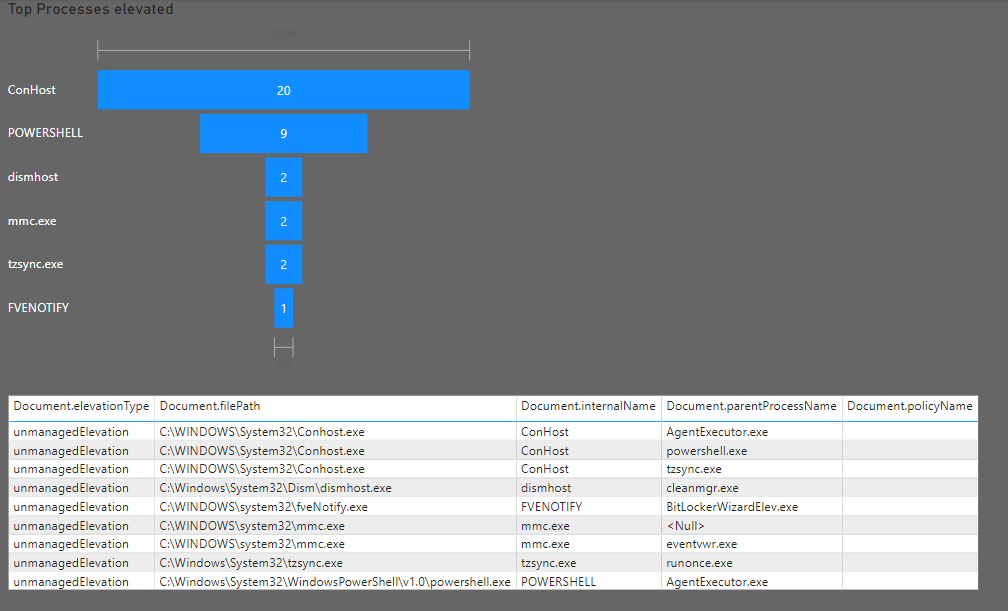
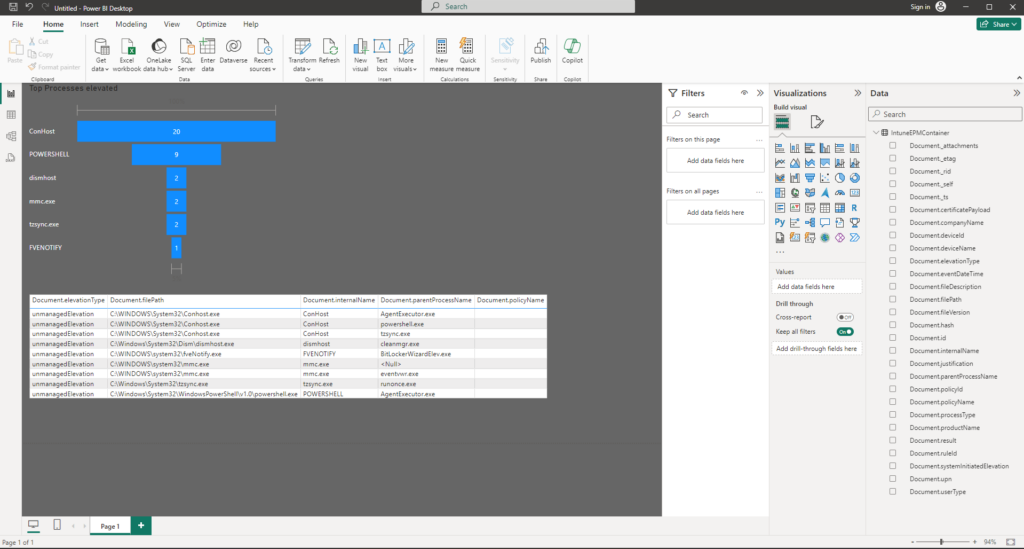
Now that everything is available, we can build our visuals like, Top processes elevated or a table with all elevations:
Conclusion
It is super easy to lose track of which Apps are elevated automatically, especially if you are working in a larger team, and / or have EPM in place for a longer time. With the option to export this data into a nice Power Bi Report, we can relatively easy verify which rules are still used and since we also cover elevations that are handled by support approved, we can also verify if we see a pattern, where we maybe should create a rule to improve user experience.
Leave a Reply